Sparkle and Butterfly Pastel Lap Quilt - Measures 53 x 40 inches - Flannel Back
My
13 year old and her friends helped me with this quilt. The fabrics are
solid pastel colors with sparkles or butterfly themed fabrics. We
pre-washed all the fabrics and flannel to preshrink it before cutting
and stitching. We washed it again after it was finished.
We
randomly stitched the squares together in the center trying not to put
any of the same colors next to each other. We pieced the butterfly
fabric around the center. There are 2 folded over fabric strips, one
purple and one yellow, around the quilt. We machine quilted it and added
the binding using the sewing machine as well.
The backing is a pastel striped flannel to make it extra warm and cozy.
This quilt measures approximately 53 inches by 40 inches.
This
quilt can be found at:
https://www.etsy.com/listing/176733620/sparkle-and-butterfly-pastel-lap-quilt?ref=shop_home_active_3
~Sarah and Ashlin (and Friends)
The Back:
The Front:
A weekly art/craft project by Ashlin, Sarah or Both. We wanted to challenge ourselves to be creative and try to expand our skills. We'd love to have some feedback and suggestions for improvement, so please leave a comment when you visit. Thanks! A few posts will be Tom's handy work, but Ashlin or I will be writing it up for him as he doesn't like to write.
Showing posts with label One of a Kind. Show all posts
Thursday, February 6, 2014
Spider Web Pieced Scrap Lap Quilt
Spider Web Pieced Scrap Lap Quilt -
Measures 43.5 by 65.5 inches - Large Lap Quilt
This
quilt has squares pieced from fabric scrap strips. They are not meant to
line up exactly. (Which is a challenge for me). It is supposed to have a
Rustic, Cottage Chic Look to it.
The main color is a denim blue. It is roughly quilted with a spider web free hand style pattern. The stitching is done in Red thread and the backing fabric is solid brown.
The Binding is machine stitched on it with a star burst pattern I hoped would look like little spiders meandering around the quilt.
This Quilt was washed upon completion. This Quilt can be found at: https://www.etsy.com/listing/176744863/spider-web-pieced-scrap-lap-quilt?ref=shop_home_active_2
On another note: I started this quilt many years ago and kept putting it away to finish later. I finally got around to finishing it, however, I should have used a spry adhesive before quilting as the back bunched while stitching a bit. Next time I'll do better. I really wish I had a BIG quilting machine, but my little one will have to do for now. ~Sarah
Measures 43.5 by 65.5 inches - Large Lap Quilt
The main color is a denim blue. It is roughly quilted with a spider web free hand style pattern. The stitching is done in Red thread and the backing fabric is solid brown.
The Binding is machine stitched on it with a star burst pattern I hoped would look like little spiders meandering around the quilt.
This Quilt was washed upon completion. This Quilt can be found at: https://www.etsy.com/listing/176744863/spider-web-pieced-scrap-lap-quilt?ref=shop_home_active_2
On another note: I started this quilt many years ago and kept putting it away to finish later. I finally got around to finishing it, however, I should have used a spry adhesive before quilting as the back bunched while stitching a bit. Next time I'll do better. I really wish I had a BIG quilting machine, but my little one will have to do for now. ~Sarah
Thursday, January 2, 2014
Hand Crafted Paper Bead Earrings
I hand crafted the paper to make the beads for these
earrings.
To color the paper: I used water, enamel paint, and Borax. It sort of Tye Dyed the paper. After it dried, I cut and rolled the paper around square toothpicks to make the beads
and sealed them with modpodge (not sure on spelling). The post earrings are hypoallergenic and there are plastic black and metal silver beads to accentuate and fill the earrings.
Each pair is one of a kind and won’t be duplicated.
Friday, December 27, 2013
A Cabinet for Brandon
Tom and I went to an auction in Rhinebeck, NY last May. While there I found this awesome print by Thom SanSoucie (www.AmericanAutoArt.com).
Tom and Brandon love Cobras, Mustangs, and any Ford Vehicle. Brandon
also loves anything burning as he is a volunteer firefighter like his
dad was.
I suggested making it into a cabinet and Tom and I talked about design ideas. We found the Mustang Horse and Cobra symbols as well as the door pull at Hobby Lobby. The Mustang Script was added after Brandon opened it on Christmas Day as Tom had a hard time finding it in the garage. It came off an old car and was in the attic. The Red, White, and Blue Mustang Emblem was also saved from the garage.
Tom designed the cabinet and stained it Dark Mahogany. A Piano Hinge was used to secure the door. I clipped the glass and picture into the frame he made and set the shelves back slightly to allow for the backing. A lockable latch and hooks for hats were added.
Tom told Brandon he would keep it if Brandon didn’t like it, but that did not appear to be an option.
~Sarah and Tom
I suggested making it into a cabinet and Tom and I talked about design ideas. We found the Mustang Horse and Cobra symbols as well as the door pull at Hobby Lobby. The Mustang Script was added after Brandon opened it on Christmas Day as Tom had a hard time finding it in the garage. It came off an old car and was in the attic. The Red, White, and Blue Mustang Emblem was also saved from the garage.
Tom designed the cabinet and stained it Dark Mahogany. A Piano Hinge was used to secure the door. I clipped the glass and picture into the frame he made and set the shelves back slightly to allow for the backing. A lockable latch and hooks for hats were added.
Tom told Brandon he would keep it if Brandon didn’t like it, but that did not appear to be an option.
~Sarah and Tom
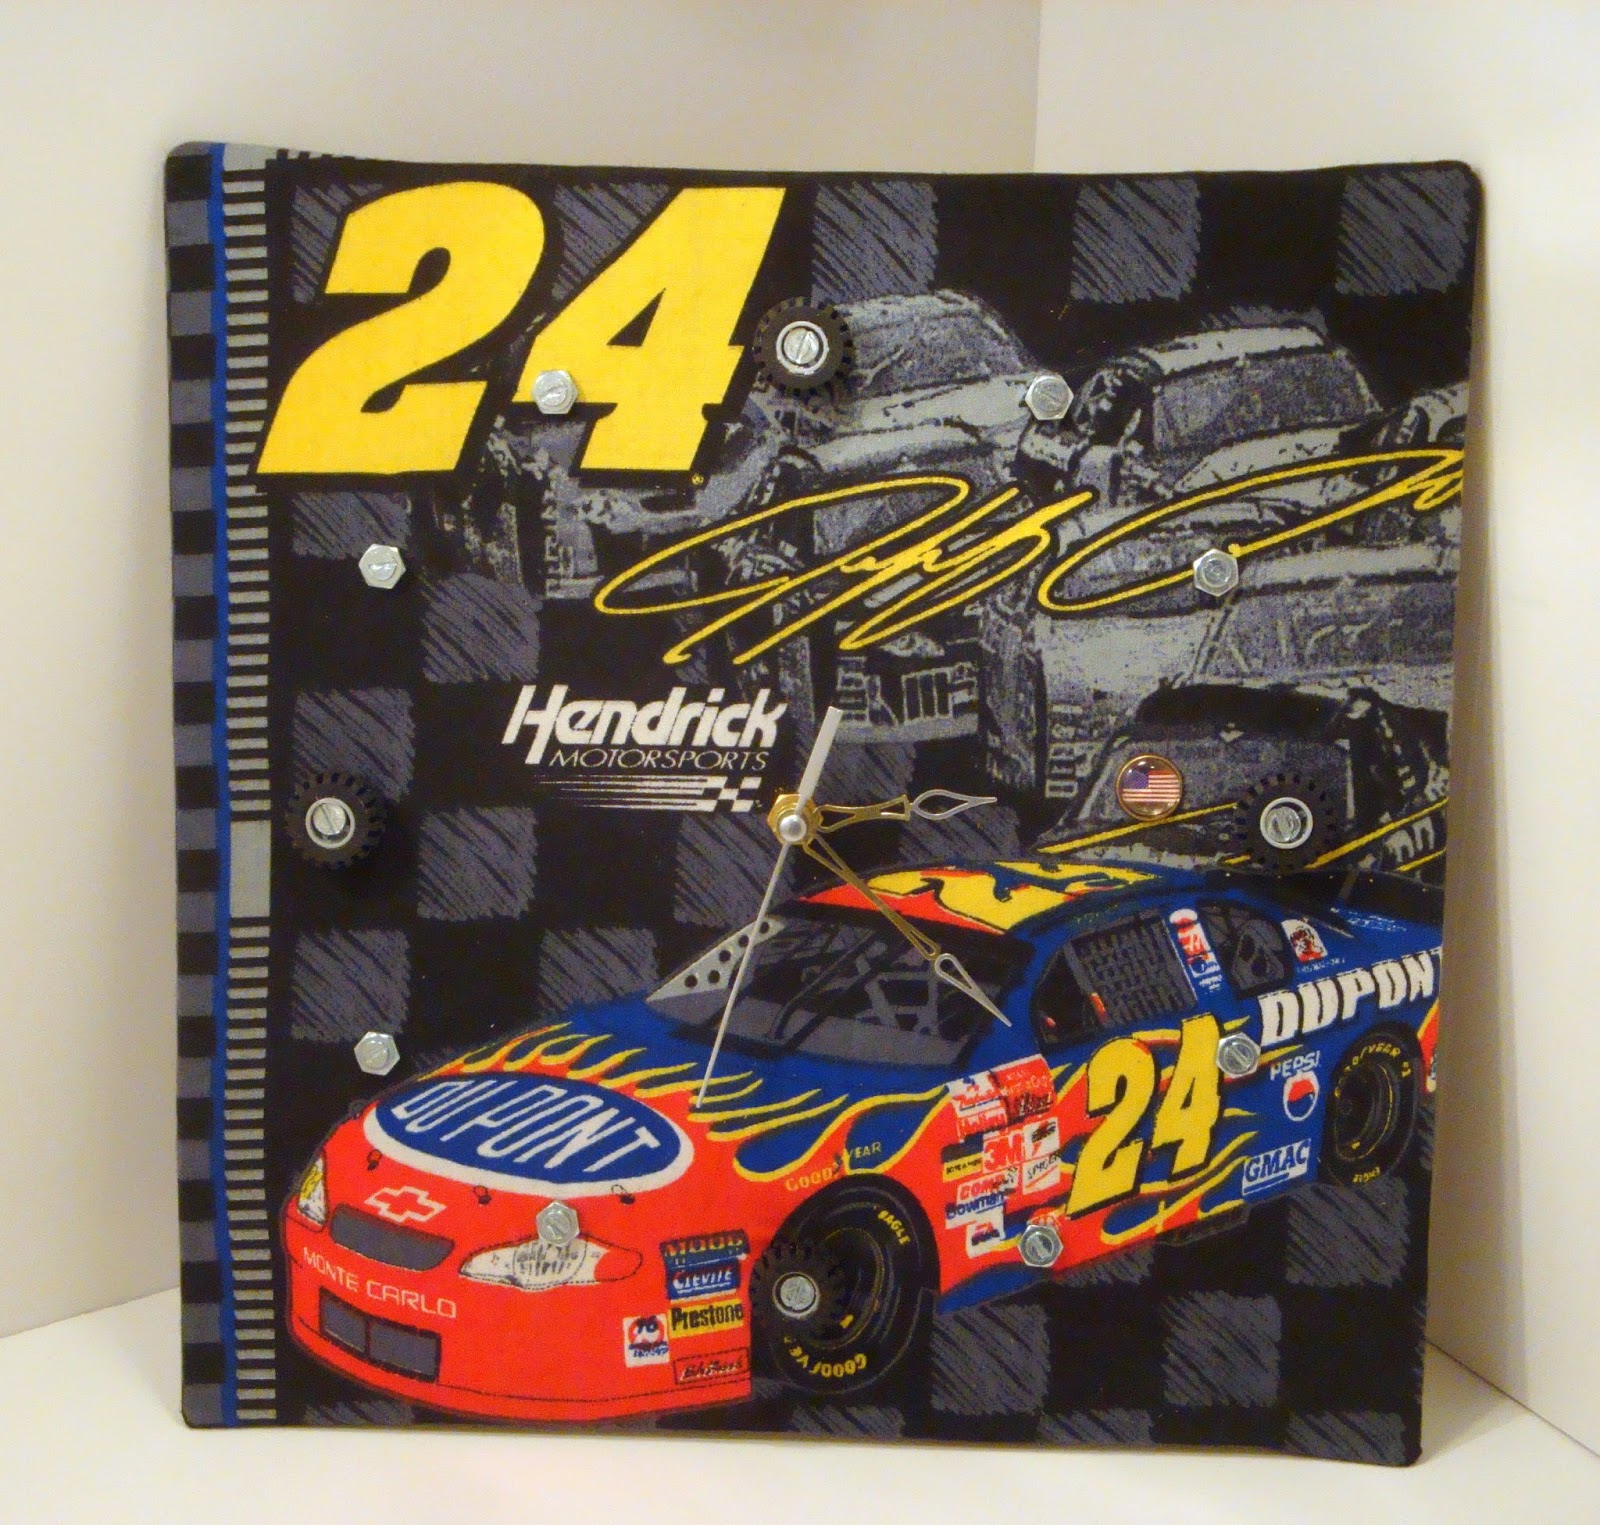
NASCAR Clock
What to use for the numbers??? Ashlin recommended using her Lego wheels for the 3, 6, 9, and 12. I had a VERY difficult time drilling through the center of the Lego pieces. That plastic is harder than one would assume! I chose nuts and bolts for the other number markers.
I had a decorative set of gold hands, but I didn't think it matched the Car theme, so I took a silver leaf pen and changed most of the hands colors.
While putting on the final wheel, the screw driver slipped and I created a whole through the board. What to do to fix it??? I have brads from scrap booking and found one that I could use from Stampin Up' that would allow me to add a flag sticker and cover it with a bubble. Perfect fix for my screw up!
Christmas Day, Trevor said that it was his favorite gift as nobody else has one and he can brag to his dad!
~Sarah and Ashlin
Subscribe to:
Posts (Atom)